
The Action Item Types are optional. Depending on your business practices, you may choose to have them enabled/disabled. If your organization has decided to use them, an administrator will need to define the action item types the user will choose from. The information contained in this topic explains the administrative setup process for Action Item Types. |
When using Corrective Action Management, you may choose to configure individual item types that are used to categorize action plans depending on how your system is set up. Some of the common action plan item types are: training, documentation, equipment, supplies, and other. These action types can be anything you wish in order to help you categorize, notify, approve, and report correctly.
Let's use an example of an issue that surfaces during an audit that requires a corrective action. Your location just completed an audit where the auditor found the sanitizer was not being kept in a red container and the proper pH was not being maintained. When the auditor marks NO, a corrective action plan is automatically generated (as set up administratively). It is then flagged, and notification is automatically sent to the Location Manager. The Manager creates an action item to train the employees on the proper method of sanitizer storage and checking the pH values. This action item would be placed under the Training Action Item Type.
You can perform the following tasks with Action Item Types:
To access Action Item Types:
Go
to Action Plans > Item Types.
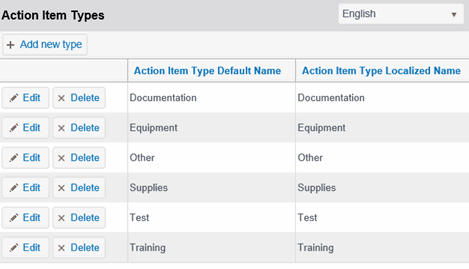
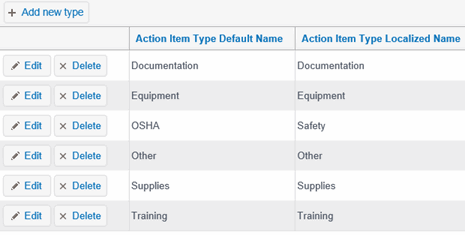
The default Action Item Types grid displays.
To add a new Action Item Type:
Click
the ADD NEW TYPE button.

A new entry is inserted in the grid.
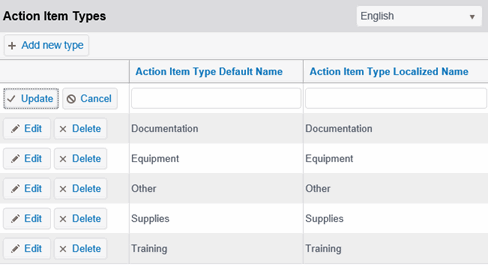
In the Action Item Type Default Name field, enter the name for the Action Item Type.
In
the Action Item Type Localized Name field, enter the name that will
display in forms and reports for the Action Item Type.
It is common
to have both of these fields be the same. However, there are
instances where you may wish to have them be different. For
example, in global companies terms may be different at a corporate
location than they are in other countries. This provides a
way to create a generic term and customize reporting based
off of it.
 |
Click
Update.
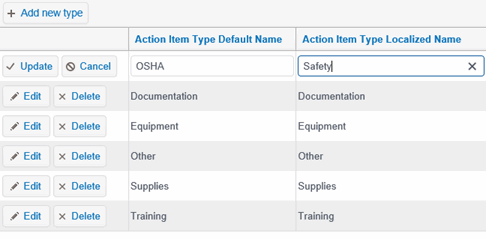
The New Action Item Type you just created is displayed in the grid
similar to the example shown below.
Click
the EDIT button for the Action Item Type you want to edit.

Edit mode is enabled.
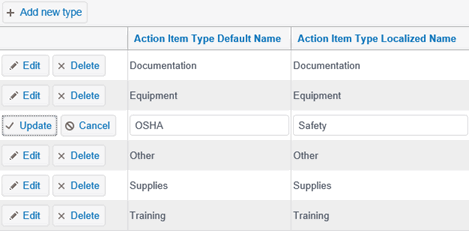
Enter
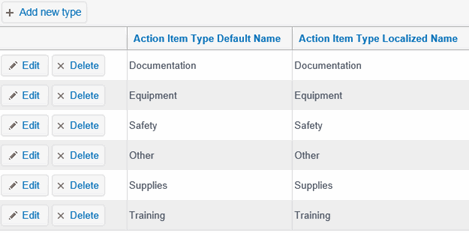
the information you want to change, then click UPDATE.
The Action Item Type is updated.
To delete an Action Item Type:
From
the Action Item Types grid, click DELETE.

A delete confirmation dialog box displays.
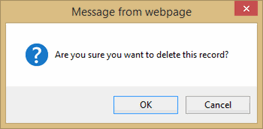
Click
OK.
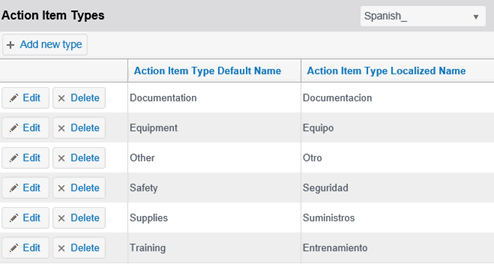
To localize an Action Item Type:
From
the Language droplist, choose the language in which you want to display.
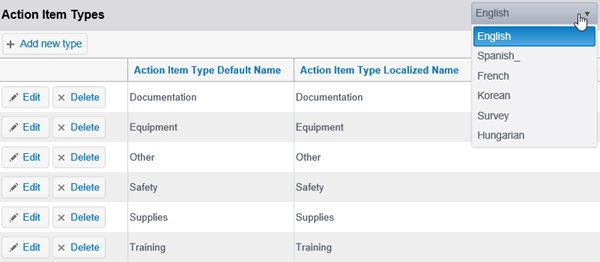
Click
EDIT to localize the label for the Action Type.

Edit mode is enabled.
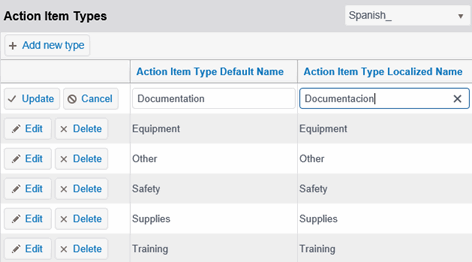
In the Action Type Localized Name field, enter the localized display text.
Click UPDATE.
Repeat
this to localize all Action Types.
