
The February 2018 Feature Release introduces RizePoint Users to the NEW Form Builder. This new feature is available to ALL RizePoint users. In addition to a slick and easy way to build your forms, we’ve added a Form Library where you will be able to access the forms that you’ve created in the new Form Builder as well as create new forms.
Let’s get started!
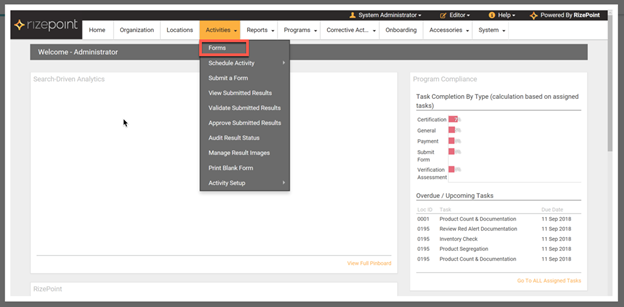
To access Form Library, click on Activities/Audits on the Menu Bar. On the Activtites/Audits drop-down, click “Forms”
The Form Library opens:
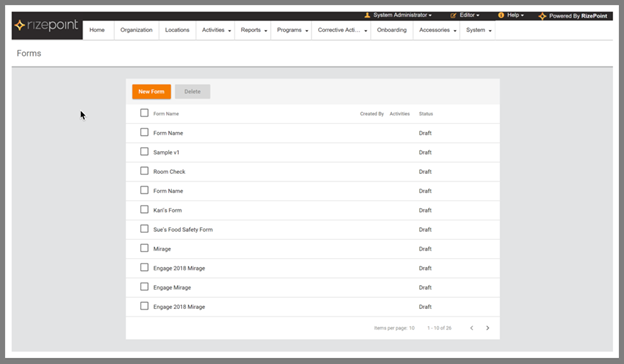
From the Form Library you will be able to:
· Create a New form using Form Builder
· Delete a form (coming soon!)
· View a form status – Draft: A form in progress, or Published: Form has been added to the Legacy System for additional editing, configuration, and deployment.
· Search existing forms (coming soon!)
NOTE! Administrators will see ALL forms
To access Form Builder, from Form Library, click “New Form”

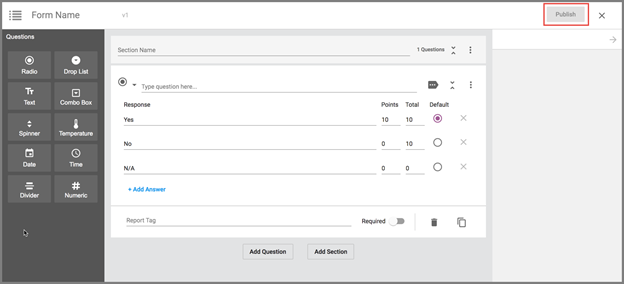
Form Builder opens:
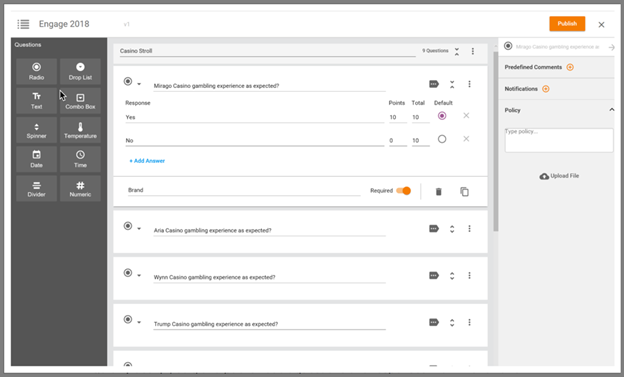
In Form Builder, you will be able to:
· Name your form
· Name/create Sections (formerly Audit Categories)
· Add/create Questions and Question Settings
· Add/configure Comments, Notifications, and Policies
· Publish a completed form to the Legacy System for additional editing, configuration, and deployment.
NOTE! Forms are auto-saved as a Draft during the form building process. We took care of it so you don’t have to worry about losing all your hard work!
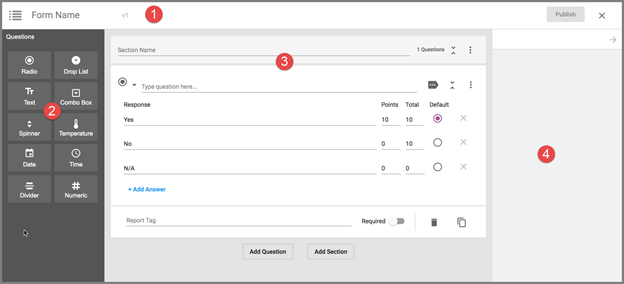
For easy navigation, the Form Builder is divided into four sections:
1. Header: Displays Return to Form Library, Form Name, Publish, Exit
2. Left-Pane: Displays the Question Types to be added to your form
3. Form Builder Canvas: Displays the Sections and Questions added to your form
4. Right-Pane: Displays Comments, Notifications, and Policies for each question type
Building a new form is now easier than ever with the new Form Builder. Designed for an intuitive user experience, Form Builder combines features from the Legacy System with a sleek user interface that will have you building your new forms in half the time! But enough chit chat! Let’s gets started!
Once you’ve clicked “New Form” in the Form Library, you’re ready to go!
To build your New Form:
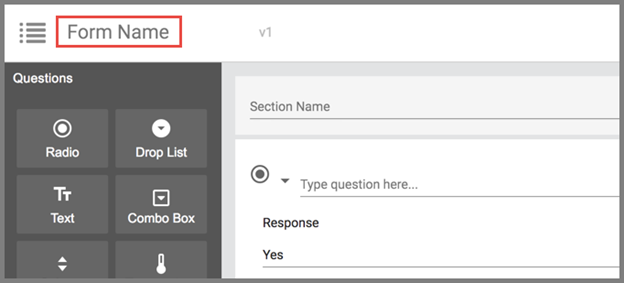
1. Give your form a Name. Select the text “Form Name” on the Form Builder Header and replace with your form name. *BEST PRACTICE* Give your form a unique name that easily identifies the form/audit you are creating.
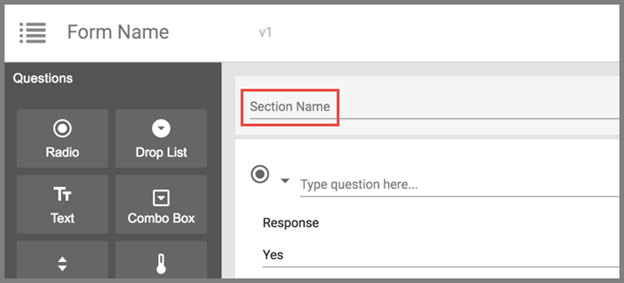
2. Next, create the first Section (formerly Audit Categories) of your form. Select the text “ Section Name” on the Form Builder Canvas and replace with your Section name.
3. Once you have created a Section, you can begin adding questions to your form. Questions added to your form will appear under the selected Section on the Form Builder Canvas. The Question types are:
· Radio
· Drop List
· Text
· Combo Box
· Spinner
· Temperature
· Date
· Divider
· Numeric
The default
question on the Form Builder Canvas is “Radio”. You can begin by customizing
this question, or change the question type by clicking on the Question
Type Drop Down icon  on the top left of the question
box on the Form Builder Canvas,
on the top left of the question
box on the Form Builder Canvas,
or click
the Garbage Bin icon ![]() to delete.
to delete.
To add a new question to your form, first click on the Section to add the question to, then click the desired Question Icon in the left-pane on the Form Builder. The selection Question Type appears underneath the selected Section on the Form Builder Canvas.
Customizing your Questions
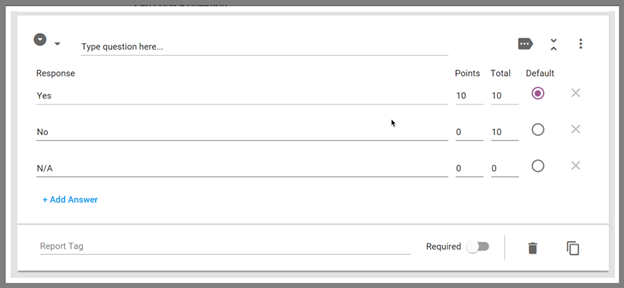
Once you have added a Question to your form, you can start customizing your questions. For this example, we are using the “Radio” Question Type as shown here:
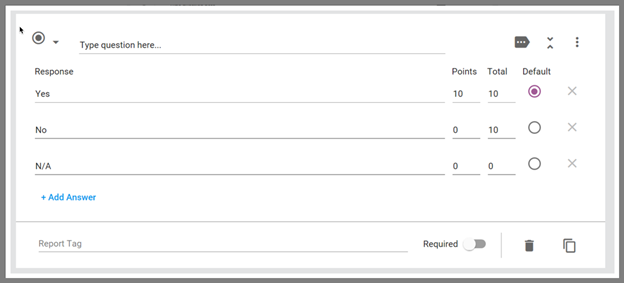
3.1. Select the text “Type question here…” and replace with your question text
3.2. Next, add the desired response(s). In this example, the responses are “Yes”, “No”, and “N/A”. The responses can be deleted by clicking on the “X” next to the response. To add new/additional responses, click “+Add Answer”.
3.3. Assign the desired Points values for each response.
3.4. Select a “Default” response. The default response will be automatically selected when the user opens the audit.
3.5. Add desired Report Tag(s)
3.6. If the question is required, click “Required”
3.7. Add any additional settings for the Question Type.
NOTE! Settings vary for each Question Type. To see a list of the settings for each question, please refer to the Form Builder Glossary.
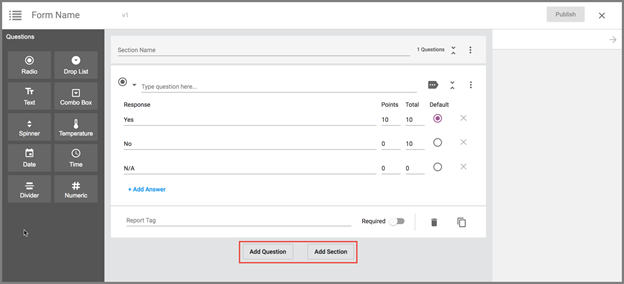
4. Continue adding Sections/Questions as required by your audit. To add a new Section/Question, on the Form Builder Canvas at the bottom of your form, click “Add Section” or “Add Question”
5. Once your form is complete, click “Publish” to add the form to the Legacy System for additional editing, configuration, and deployment.
And that’s it, you’re all done! Pretty easy, huh? We think so.
Answer Type: Compliant, Non-Compliant, Informational
Form Builder: New feature that allows users to create new forms
Form Builder Canvas: In Form Builder, this is where users will create new forms by adding Sections and Questions to a form.
Form Builder Left-Pane: Displays Question Type icons for builder to select when adding Questions to a new form.
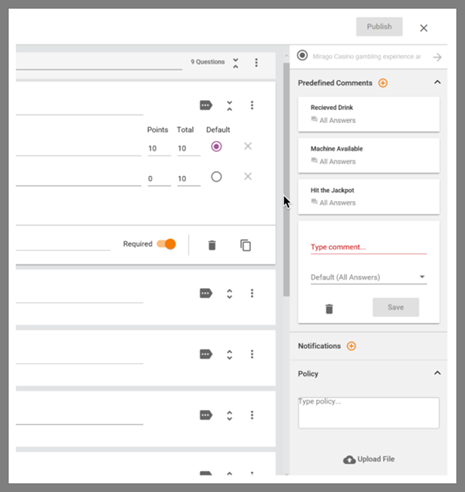
Form Builder Right-Pane: Displays additional Settings for questions such as Predefined Comments, Notifications, and Policies. Available Settings vary by question type. Refer to the Question Type definitions to see which Settings are available for each Question Type.
Form Library: Forms that have been created in the Form Builder are listed here. Access form builder by clicking the “New Form” button.
Logic: Ability to set up triggers (display additional questions) based off the answer to the previous question.
· Condition Logic- Only apply to Numeric questions. If the value is X, give a score of Y. (If temp is 67 degrees, give 10 out of 10, if out of range you can fail. Provides users the ability to score a numeric answer.)
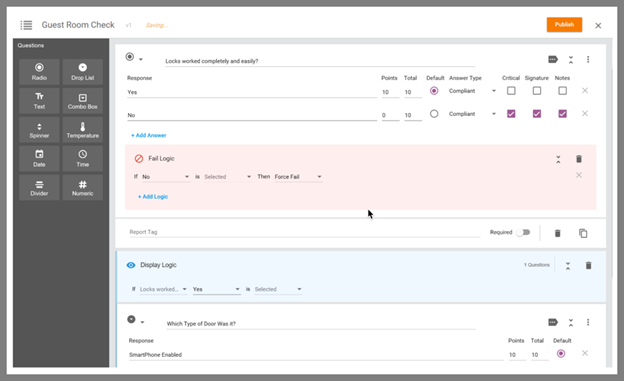
· Fail Logic– Fail Logic can be applied when Auditor selects a response that does not meet the criteria to pass an audit or Section within the audit. Builder applies Fail Logic to automatically Fail the audit or Section within the audit.
· Display Logic- Adds the option to trigger additional questions based on the answer to the previous question.
Notifications: Pop-up given to auditor based on response. For example: “Are you sure you want to select this response? Doing so will fail the audit.” Notifications let the auditor know that the response they are selecting has a following consequence or action.
NOTE! Previously, Notifications were an optional feature that had to be turned on by a RizePoint Engineer, now this feature is available by default to applicable question types.
Policy:Form builder has the option to type or upload policy information to ensure the auditor understands how he/she should be answering the questions, what he/she should be looking for, what the audit requirements are, etc.
Pre-defined Comments: To help auditors complete the audits, Builder has the option to create “pre-defined comments” during the form building process. The comments are then presented as a drop-down list to the auditor to be able to select.
EX: Builder creates the predefined comment “Looks great!” for the auditor to be able to easily select when completing an audit.
Question Types
· Radio: Auditors will answer this question type by selecting the appropriate radio button. Options for the “Radio” question type include:
o Points value
o Settings: Critical, Signature Required, Notes Required, Answer Type, Display Logic, and Fail Logic
o Right-Pane: Predefine Comments, Notifications, Policies

· Drop List: Auditors will answer this question type by selecting the appropriate response from a builder-created drop-down list. Options for the “Drop List” question type include:
o Points value
o Settings: Critical, Signature Required, Notes Required, Answer Type, Display Logic, and Fail Logic
o Right-Pane: Predefine Comments, Notifications, Policies
· Text: Auditors will answer this question type by typing a text response. Builder will choose whether the auditor is allowed a Short answer (50 characters) or Paragraph (500 characters)
o Settings: None
o Right-pane: Predefined Comments, Policies

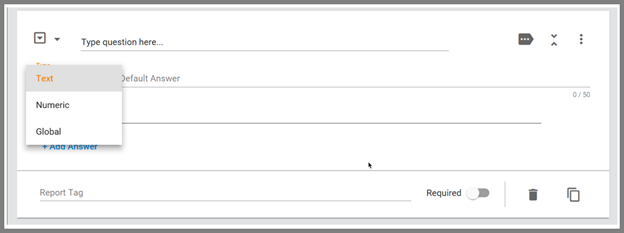
· Combo Box: Within the question, Builders will choose: Text, Numeric (both create a drop-down list on the fly), or Global Combo
o Text: In addition to being able to add a short written response (50 characters), Auditors can also select an answer from the Builder-created drop list.
§ Settings: None
§ Right-pane: Predefined comments, policy
o Numeric: Set Min, Max, Default, Precision, Builder also creates a range/numeric value to be selected from the drop list.
§ Settings: Condition Logic
§ Right-Pane: Predefined comments, policy
NOTE! Global Combo Box list is populated from “Activities -> Activity Setup -> Global Combo Box”
· Spinner: Create a Numeric “Spinner” to allow the Auditor to select the appropriate value response.
o Settings: Condition Logic
o Right-pane: Predefined Comments, Policies
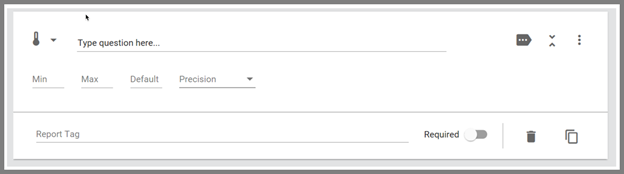
· Temperature: Numeric values – Min, Max, Default, Precision (X, .X, .XX, .XXX)
o Settings: Condition Logic
o Right-pane: Predefined Comments, Policies
· Date: Add a Date to the form. Useful in specifying the date of an audit or event/instance.
o Settings: Condition Logic
o Right-pane: Predefined Comments, Policies

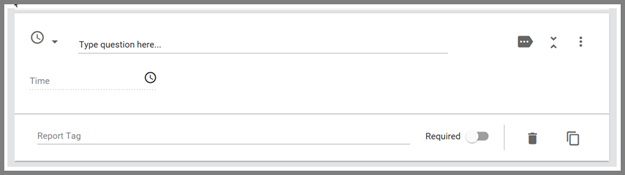
· Time: Add a Time to the form. Useful in specifying the time of an audit or event/instance.
o Settings: Condition Logic
o Right-pane: Predefined Comments, Policies
· Divider: Use the Divider to separate questions in the Form without adding a new Section
o Settings: None
o Right-pane: None

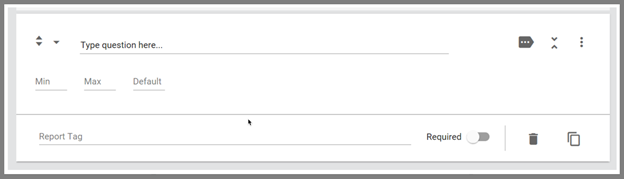
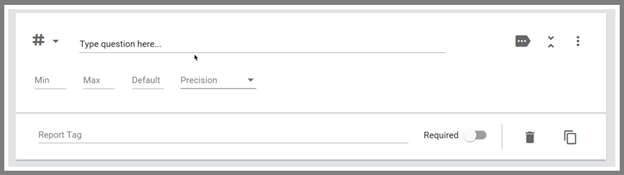
· Numeric: Add a question with a numerical value response – Min, Max, Default, Precision (X, .X, .XX, .XXX), Format
o Settings: Condition Logic
o Right-pane: Predefined Comments, Policies
;<span