Franchisee Self-Management

 |
OPTIONAL FEATURE - Contact your
RizePoint representative to enable/disable this option. |
- Log in to the website with the username and password provided.
- Select MANAGE USERS & HIERARCHY command from the Administration
menu.
- The Franchisee Self-Management page opens. It contains two options:
You'll need to create users that you can associate with various management
units within the management hierarchy. You'll also need to assign each
user to a role, with the permissions they require to perform their responsibilities.
Some users, for example, will need access to audit results and reports.
Other users may also require permission to upload documentation to the
server.
Click the MANAGE USERS link to open the users page. From this page,
you can perform the following functions:
The first time you view the Users page, only one user appears in the
list: yourself.
To
create a new user:
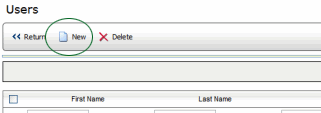
- Click the NEW button. A blank User Profile page opens to the GENERAL
INFO tab.
- Enter a name for this user and any additional optional information
that you want to include.
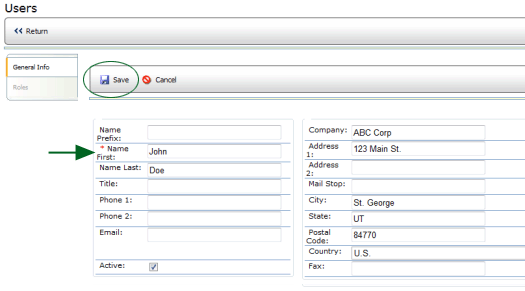
- Click the SAVE button.
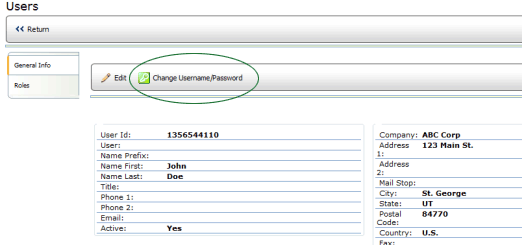
- Click the USERNAME/PASSWORD button. In order for this person to
have access to the website (to be able to access reports, upload files,
etc.), you will need to provide the user with a username and password.
- Enter a username and password for this user. This is the username
and password the user will use when he/she logs on to the system.
Remember that passwords are case sensitive.

- Click SAVE to return to the User profile page.
To
assign user roles:
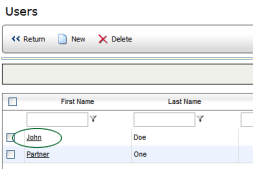
- In the User list, click on the first name link to open the User
Profile page for that user.
- Click the ROLES tab.

- Click the ADD link.

- Select the role.
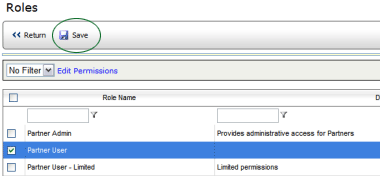
- Click the SAVE button.
To
view or edit a user:
- In the User list, click on the first name link to open the user's
User Profile page.

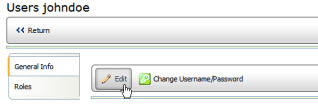
- Click the EDIT button to edit any of the data on the GENERAL INFO
tab.
- Make any required changes.
- Click SAVE.
To
change the role of a user:
- In the User list, click on the first name link to open the user's
User Profile page.
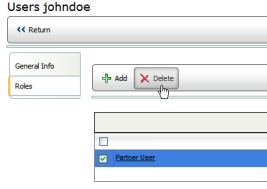
- Click the ROLES tab.
- To delete an existing role, select the role, then click the DELETE
button.
- To add a different role, click the ADD button.

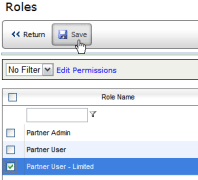
- From the list of available roles that is displayed, select the
role you want to add, and click SAVE.
To
delete a user:
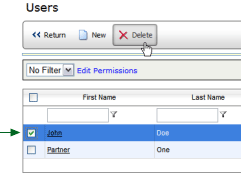
- Click the checkbox beside the user that you want to delete.
 |
Be sure to check the box to select the
user. If you instead click on the first name link, the user's
profile page opens. You don't want to open the profile page;
you merely want to select the user. |
- Click the DELETE button. The selected users are removed from the
list.
This is where you define the structure of your management levels. You'll
set up your management units in a hierarchy that allows you to easily
visualize and manage the various levels.
Managing hierarchies consists of the following steps:
To
define the Management Hierarchy:
The first time you select the MANAGE HIERARCHY option, you will be asked
to define the type of management structure you want to create.
- Select MANAGE USERS & HIERARCHY from the Administration menu.
- Click MANAGE HIERARCHY.
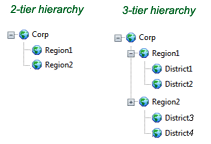
- On the Manage Organization Hierarchy page, use the droplist to
select the type of management tree that represents your organization.

As you select an option from the droplist, the navigation tree on
the left dynamically adjusts to provide a visual representation. If
necessary, you may change the names of the levels later.
 |
Do NOT count locations (stores, properties,
accounts, etc.) as a level. You will add locations to the
bottom level of the structure later. |
- Click the NEXT button.

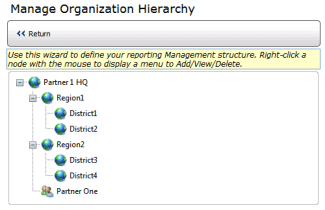
The Manage Organization Hierarchy page opens, with the management tree
you defined. Notice that your username appears under the top level of
the management hierarchy, giving you access to all management records.
To
create a new management unit:
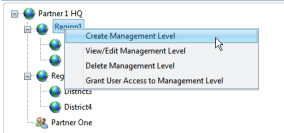
- Right-click on the management unit in which you want to create
a new management record. Place your mouse cursor over the management
unit.

When it highlights, click the right mouse button once to display
a menu.
- Select CREATE MANAGEMENT UNIT from the menu. A new profile page
opens.
- Provide the required data (indicated by a red asterisk*), and any
additional optional information that you want to include.
- Click the SAVE button.
To
view/edit management units:
- Right-click on the management unit that you want to view or edit.
- Select VIEW/EDIT UNIT from the menu.
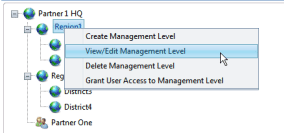
- To edit the information, click the EDIT button.
- Edit the data as required.
- Click the SAVE button.
To
delete management units:
- Right-click on the management unit that you want to view or edit.
- Select DELETE UNIT. Use caution, as deleting a management unit
also deletes any "child" management units within the selected
unit.
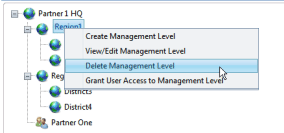
- A message displays asking you to confirm that you want to delete
the record.
- Click DELETE to delete the record, or click RETURN to cancel the
delete operation.
To
grant user access:
- Right-click on the management unit in which you want to place the
user.
- Select ADD USER from the menu.
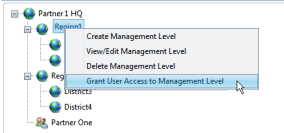
- Check the box beside the user(s) to
whom you want to grant access.
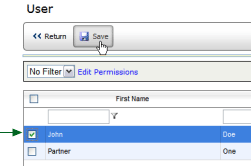
- Click the SAVE button. The selected users are added and now have
access to reports and other data associated with this level.
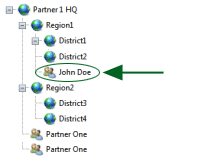
To
add locations to a management unit:
The ASSIGN LOCATION TO MANAGEMENT LEVEL menu option is only available
when you right-click a management unit at the lowest level. Also note
that you cannot add new management units inside the lowest level unit.
You may only add locations and users to the lowest level.
- Right-click on the management unit.
- Select ASSIGN LOCATION TO MANAGEMENT LEVEL from the menu.
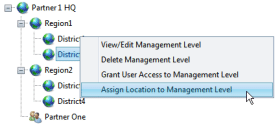
- Check the box beside the location(s)
that you want to add to this management unit.
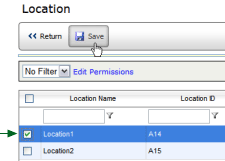
- Click SAVE. The selected locations are added to the management
unit.


ref:
PartnerAdmin, MultipleMenus


