Requesting a Waiver

 |
OPTIONAL FEATURE - Contact your
RizePoint representative to enable/disable this option. |
If a location feels there is sufficient reason for not complying with
a specific standard, a waiver may be requested. Note that a user must
have both the POLICY - VIEW POLICIES and the WAIVER - CREATE WAIVER permission
in order to submit a request for a waiver.
To
request a waiver on a policy:
- Log on as a user with the permission to view standards and create
waivers.
- Go to LOCATIONS. All locations available to the user appear in
the list.
- Select the location that is requesting the waiver.
- Click on the WAIVERS tab to select it. A list of existing waivers
is displayed.
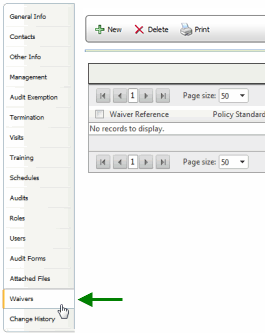
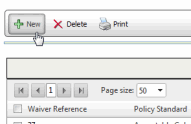
- Click the NEW button. A list of standards is displayed.
 |
If you want to view a standard, click
the link in the NAME column to display the details. When you're
finished reviewing the standard, click the RETURN button. |
- Check the box beside a standard to select it. Select only one standard.
You may request waivers on multiple standards, but you may only request
them one at a time.
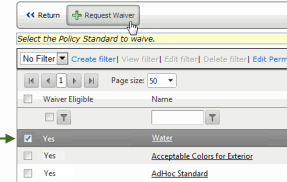
- Click the REQUEST WAIVER button. The Waiver Request form opens.
- In the Waiver form, select AUTO RENEW or TEMPORARY from the Type
droplist. If you select AUTO RENEW, this waiver (if approved) will
remain in effect indefinitely. If you select TEMPORARY, this waiver
will expire on the Expiration Date specified (see next step).
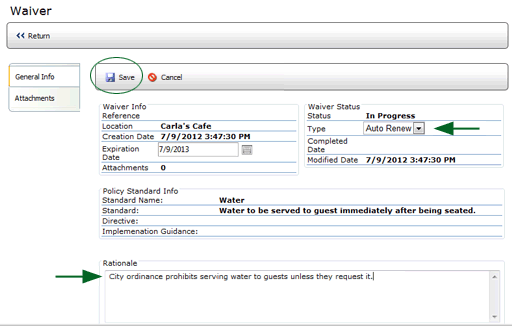
- If you are requesting a temporary waiver on a policy, enter the
expiration date on which the waiver will terminate in the EXPIRATION
DATE field. You may enter the date directly in the field, or you may
click the Calendar icon beside the field to display a calendar, then
click the date on which the waiver will expire. Note that if you selected
AUTO RENEW as the waiver type, this field is ignored.
- In the RATIONALE box, enter the reason for requesting this waiver.
- Click SAVE.
To attach supplemental documentation
to the waiver request:
You may need/wish to attach supplemental or supporting documentation
to your request.
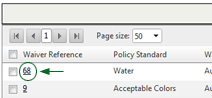
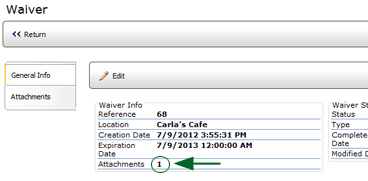
- Click on the WAIVER REFERENCE link to view the details of the waiver
request.
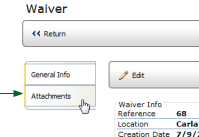
- Click the ATTACHMENTS tab.
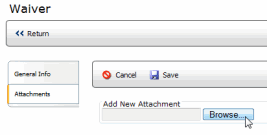
- Click the NEW button.
- Click the BROWSE button.
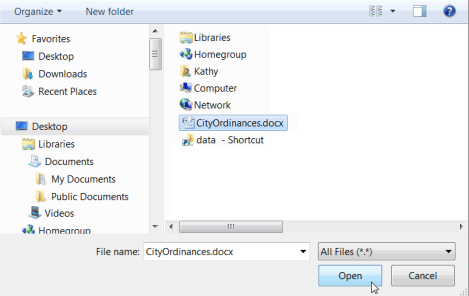
- Locate and select the file, then click the OPEN button.
- Click the SAVE button.
The file is attached to the waiver request. Note that the total number
of files attached to this waiver request is indicated.
To
check the status of a waiver request:
The STATUS column on the WAIVERS tab of the Location Profile displays
the current status of the waiver request. The following statuses are possible:
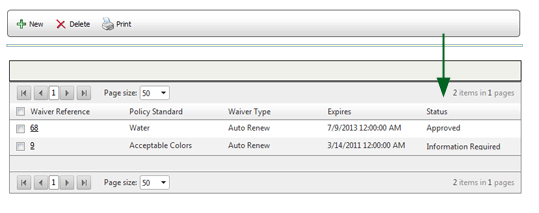
- IN PROGRESS - The request is currently in progress.
- INFORMATION REQUIRED - More information has been requested. An
email has been sent to the Primary Contact. Once the information has
been received, the status will return to IN PROGRESS until the request
has been approved or denied.
- APPROVED - The waiver has been approved.
- DENIED - The request for a waiver has been denied.

ref:
Waivers