Enhanced Corrective Action Planning

 |
OPTIONAL FEATURE - Contact your
RizePoint representative to enable/disable this option. |
The ENHANCED CORRECTIVE ACTION PLANNING option allows users with the
appropriate permissions to define detailed action plans, which include
the ability to identify the root cause of the problem and to determine
what action must be taken to prevent the problem from occurring again.
- Log on as a user with SYSTEM SETUP ACCESS and USERS/ROLES permissions.
- Go to System > Manage Users > Users.
- Verify that all users who are expected to create action plans have
the appropriate permissions assigned to them. Select a user, and then
click the Permissions EDIT button.
The following permissions apply to Action Plans:
- ACTION PLAN - EDIT - allows a user to edit Action Plan items
within an audit result.
- ACTION PLAN - CREATE - allows a user to create an Action Plan.
- ACTION PLAN - DELETE - allows a user to delete an Action Plan.
- ACTION PLAN - APPROVAL - allows a user to approve an action
plan item, making it read-only. This permission would normally
be granted to an administrator or manager only.
- Click SAVE & RETURN to save the selected user's permissions.
Once the appropriate permissions have been assigned, you'll need to
verify that an Action Plan feedback report is available with specific
audit results.
- Go to Audit > Audit Setup > Audit Forms.
- Select the audit form that may require an Action Plan feedback
report.
- Select FEEDBACK REPORTS.
- Make sure the Action Plan report is selected.

- Click SAVE & RETURN.
- Log on as a user with ACTION PLAN - EDIT permission.
- Go to Reports > Feedback Reports or Audits
> View Audit Results.
- Navigate to, and select, the audit for which you want to create
an action plan.
- Select the ACTION PLAN feedback report. You may view only questions
that received NON-COMPLIANT answers, only questions that received
COMPLIANT answer, or ALL questions.
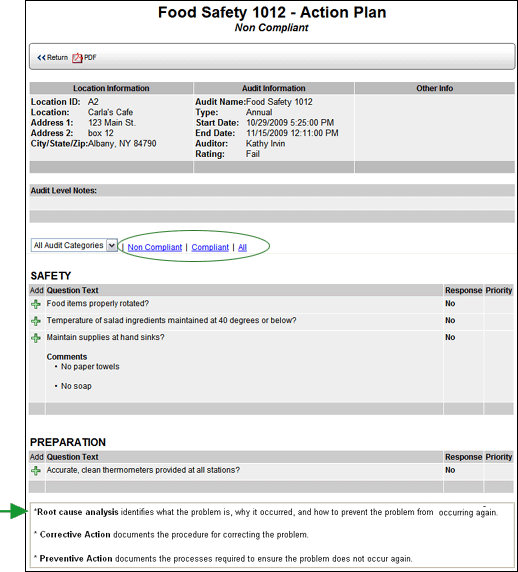
Note the information screen at the bottom of the window. Administrators
can use this area to provide notes or instructions to those users
who are required to create/define a plan of action. See
instructions below.
- Click ADD button.

- Define the action plan. This includes Root Cause Analysis, Action
Plan, and Preventive Action Plan.
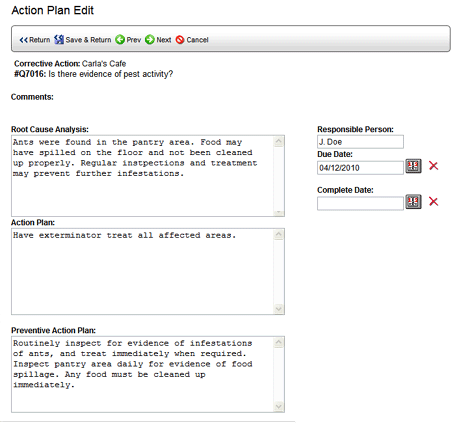
- Enter the name of the person responsible for executing the action
plan.
- Assign a due date. You may enter a date directly in the DUE DATE
text field, or click the calendar icon to select a due date from the
calendar.
- Once the action plan has been completed, the COMPLETE DATE may
be specified.
- Select a SAVE & RETURN.
Once an action plan has been defined, buttons are provided that allow
users with the appropriate permission to DELETE  ,
EDIT
  , or APPROVE
  the plan of action.
Once the action plan has been approved, the APPROVE icon becomes an
UNAPPROVE icon . Clicking this button
lets you remove the approval from this action plan.

You may also create an automated feedback rule so that email is sent
if an action plan is not completed by the due date.
To create automated feedback for overdue action plans:
- Log on as a user with AUTOMATED FEEDBACK ADMINISTRATION permission.
- Go to System > Correspondence > Automated Feedback
Rules.
- Select NEW to create a new automated feedback rule.
- Assign a name and description to this rule.
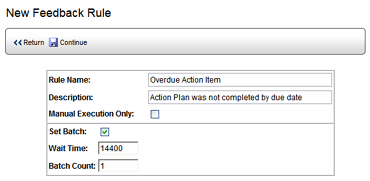
- Select the SET BATCH checkbox.
- In the WAIT TIME field, enter the number of minutes to wait before
sending automated feedback. For example, if the person responsible
for correcting the non-compliancy is given 10 days to complete the
action plan, then enter 14400 in the WAIT TIME field (10 days x 1440
minutes per day). If you fail to enter a value in the WAIT TIME field,
feedback will be generated immediately after results are uploaded,
because no time has been given to complete the action plan.
- Enter "1" in the BATCH COUNT field. A "1" in
this field means that as soon as the WAIT TIME has expired, immediately
send an email to the designated recipient(s),
and do not wait for other overdue action plans before sending an email.
- Click CONTINUE.
- Add Management/Locations, then specify the forms, auditors, and
audit types.
- In the Condition field, select ACTION PLAN COMPLETION.

- Add recipients, and set the parameters of the email.
If an action plan is not completed within the specified time period,
an email message is automatically sent to the designated recipient(s).
To edit the data
at the bottom of the Action Plan (does not apply to an Executive Summary):
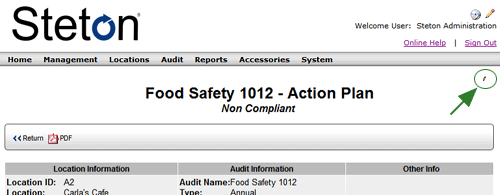
- As an administrator or manager with the LABELS - EDIT permission,
click the small Edit pencil in the upper right corner of the window
to enable Edit mode. Do NOT confuse this with the larger Edit pencil
in the header of the window.
- Click the edit pencil beside an item to edit the contents of
this area of the report. Remember that any changes you make here will
appear on ALL action plans.

- Enter the new text in the setting field on right.
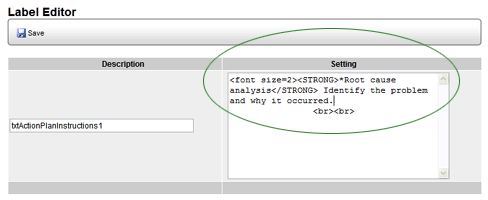
- Click the SAVE button.
- Click the small Edit pencil
again to disable Edit mode.

ref:
actplaninstr/approval/enhactplan/FBCond


![]() ,
EDIT
,
EDIT ![]() , or APPROVE
, or APPROVE ![]() the plan of action.
the plan of action.![]()


