
Many of the pages display data in a grid, or table format. The grid labels and columns can be configured by a user with the appropriate permissions.
To modify the grid labels in a legacy grid:
Go
to Editor > Site Editor.
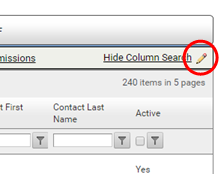
A pencil icon displays in the upper right side of the grid to let you
know you are in edit mode.
Select
the Edit pencil drop-down list.
The Edit drop-down list displays.
Select
Content Editor.
The Content Editor displays a list of all editable labels for the grid.
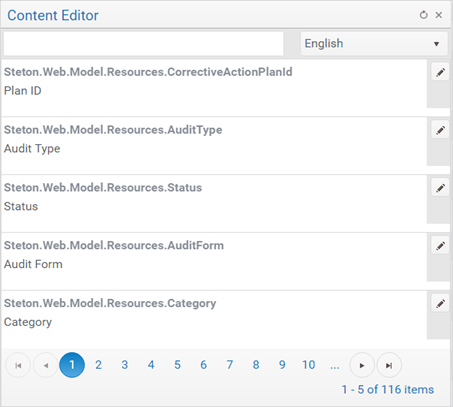
Select
the Edit Pencil next to the label you want to modify.
The line item displays in edit mode.

Enter
the new label text, then select CHECKMARK button to apply the changes.
-OR-
Select the CANCEL button to discard changes.
Close the Content Editor window.
To edit which columns display and in what order for the legacy grids:

To edit the left/right position of the column in the grid:
Check the box beside the grid
item that you want to edit.
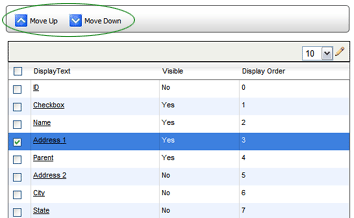
Click the MOVE UP button to move the column one position to the left, or click the MOVE DOWN button to move the column one position to the right.
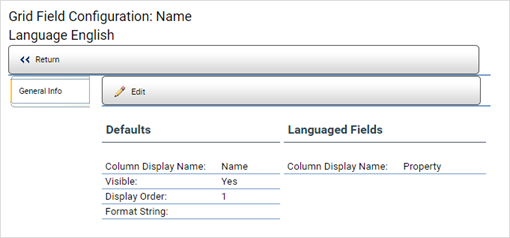
To edit other specifications of the column:
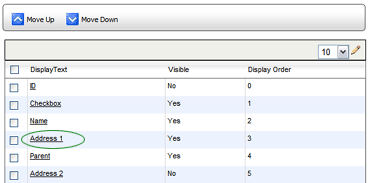
Select the grid item that
you want to edit.
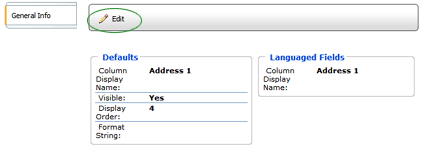
Click the EDIT button, then edit the specifications as desired. You may edit the following items:
VISIBLE: Allows you to specify whether or not to display this column in the grid.
DISPLAY ORDER: Allows you to change the position of the column by entering a different column order in this field.
FORMAT STRING: Allows you to specify a format to use for certain fields, such as Date/Time or Y/N.
COLUMN DISPLAY NAME: Allows you to change the label that appears at the top of the column.
| Changes made here apply to the current language only. |
Click the SAVE button.
Click RETURN.
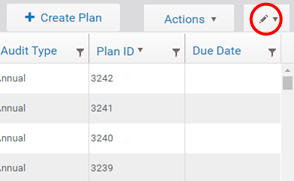
To edit which columns display and in what order for the new RizePoint grids:
Select
the Edit pencil drop-down list.
The Edit drop-down list displays.
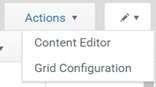
Select
Grid Configuration.
The Grid Config dialog box displays. From this dialog, you can select
which columns will display and you can click and drag the rows to
modify the display order.
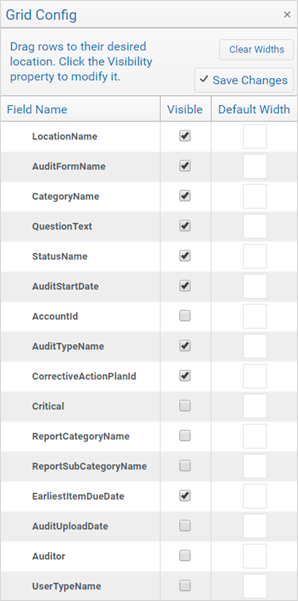
Click CLOSE (X button).
