Using the Small Edit Pencil to Edit Screen Contents


  1. Log on as a user with CONTENT EDITOR permission.
  2. From the Header menu, go to Editor > Site Editor.


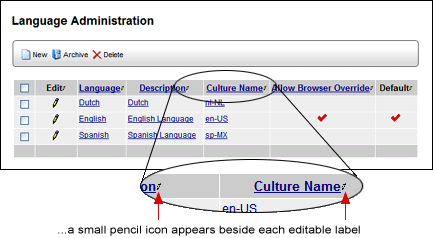
    An edit pencil appears beside each field or label that can be edited, indicating you are in edit mode.


Do not confuse this small pencil icon with the slightly larger pencil icon that appears in the head of the window.


  1. Click the Edit pencil beside the label you want to edit. The Label Editor window opens.

  2. Edit the SETTING to change the text of the label or field.
  3. Click OK.

    The new label (field name, description, etc.) replaces the previous label in all occurrences throughout the application (current language only), so use caution when changing labels in this manner. For example, if you edit the name of one of the feedback reports, the name of the report will be changed throughout the application, even though you changed the name of the report at the form level.

  4.  Click the Edit pencil again to exit edit mode, thus removing the pencil icons that appear beside the editable fields.