
Users with the appropriate permissions may import engagement data into
RizePoint from an Excel spreadsheet. However, the application expects
the data to be formatted in a very precise manner. The order of the columns
in the spreadsheet, as well as the column headings, must match exactly
the order in which data is stored within the application. Separate multiple
entries in a cell with a comma.
| Users with the LIMIT IMPORT/EXPORT permission may only import/export locations to which they have access, either directly or indirectly. When importing a new location, the user must also have access to the management level in which the new location resides. Otherwise, the import procedure will fail. Users with this LIMIT IMPORT/EXPORT permission can ONLY import locations; they cannot import management records nor users. |
To ensure the data is formatted correctly:
When the new data from the spreadsheet is imported, all data and column headings are in the proper position.

Since you're not modifying any of the data, you won't need to lock the dataset. The reason for exporting the dataset is merely to copy the headings to ensure that the data in the spreadsheet matches exactly the data that is expected when the spreadsheet is imported.

|
| Roles can be exported from RizePoint into Excel, allowing administrators to easily view the permissions and other attributes associated with each role. However, this dataset cannot be imported back into RizePoint. This feature is provided simply as an additional means of role management. |


| Before you enter any data into this spreadsheet, you may want to save a copy to use as a template. You can then use this template again later to import this type of data into the same version of RizePoint. Because column headings and fields may differ in various versions, you should always create a new template if you change to a newer version of the application. |
| When importing Location and Management data, it is important that if your Location or Management spreadsheet contains a value in the UserID field, that user must already exist in the system to which you are importing. Otherwise, an error will occur. You may be able to avoid this situation by importing User data before importing Location and Management data. |
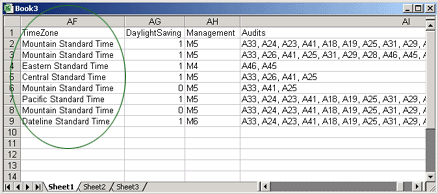
When working with Location engagement data,
the text you enter in the Time Zone column must appear exactly
the same as the Time Zone entry contained within the Windows registry.
If you're not certain of how this entry should appear, leave the
Time Zone column blank. When this field is left blank, the time
zone of the server is assigned by default when the Location dataset
is imported. If necessary, you can then re-assign the Time Zone
setting from within the application. |

To avoid the possible loss of data, you must always lock a dataset prior to importing new data. This prevents other users from modifying the existing dataset while the new data is being imported. (Note: The ROLES dataset cannot be imported into RizePoint; therefore, no LOCK link exists for this dataset.)

