Viewing Images

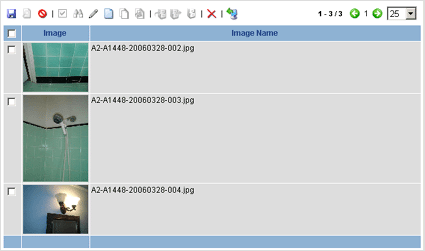
The IMAGE VIEWER menu option allows users to view images that have been
attached to audit results and uploaded to the server. Users can view images
from audits that have been conducted on all locations to which they have
access.
From this page you can:
If you have the IMAGE MANAGER ADD/DELETE permission, you may also:
VIEWING
IMAGES
Users can view images that were uploaded from locations to which they
have access. No special permission is required.
- On the left navigation bar, go to Audit > Manage Audit
Images.
- Select IMAGE VIEWER.
- Navigate to the location that contains the audit results that you
want to view. When you select a location, all audits conducted on
that location appear in the list.

- Click on the audit that contains the images that you want to view.
When you select an audit from the list, all images that were uploaded
with the audit results are displayed.

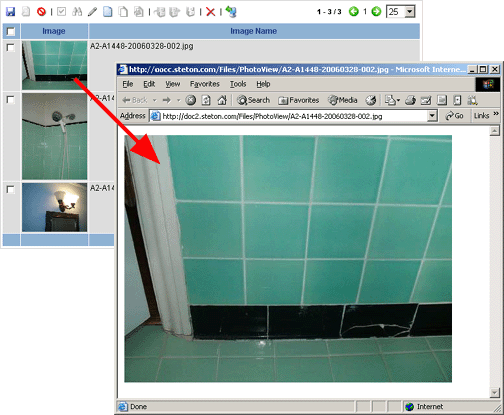
To view a larger version of an image, click on the image in the list.
The image opens in a new browser window. The size of the image is determined
by the settings in the Mobile Auditor
configuration file.

EXPORTING IMAGES
Exporting an image allows you to save a copy of it to another location.
It does not remove the image from the Image Manager.
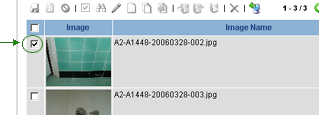
- Select the images that you want to export by clicking the checkbox
beside the image.

- Click the EXPORT button on the button toolbar. A message is displayed
to confirm that you want to export the selected images. Click OK to
continue.
 |
If multiple
images were selected to export, they will be downloaded in
a single zip file. |
- In the File Download dialog, click SAVE.
- In the SAVE AS dialog, navigation to the location where you want
to save the copy of the image. You may also change the default name
of the image.
- Click SAVE.
ADDING IMAGES
You may add additional images to an audit result after the audit has
been uploaded to the server. Note that in order to add an image, the audit
must already contain at least one image. Otherwise, the audit will not
appear in the list.
- Log on as a user with IMAGE MANAGER ADD/DELETE permission.
- Go to Audit > Manage Audit Images.
- Navigate to the location that contains the audit results that you
want to add images to.
- Select the audit that you want to add an image to.
- Click the NEW button on the button toolbar. A new field is provided
at the top of the list.

- Browse to the image that you want to add to the audit result.
 |
Currently,
a name will automatically be assigned to the image by the
system. |
- Click the SAVE button on the button toolbar. The image is added
to the list.
DELETING IMAGES
To delete an image from the Image Manager:
- Log on as a user with IMAGE MANAGER ADD/DELETE permission.
- Go to Audit > Manage Audit Images.
- Navigate to the location that contains the audit results that you
want to delete an image from.
- Select the audit that contains the image that you want to delete.
- Click the DELETE button. The image is removed from the Images list.


