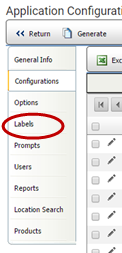

When you capture an audit-related image, it may be helpful to adjust the width of the image (in pixels) to fit the screen of the device on which it will be viewed.
| Some users need to annotate an image and also adjust the image's width as it displays on the device screen. If you want to annotate images in Mobile Auditor, you will need to have the following configuration option enabled: "Boolean for: Enable Image Annotate." See Mobile Auditor Configurations. If you also need to adjust the image width, follow the instructions below. |
| If you attach images, keep in mind that the default resolution setting on many of today's devices is very high. For this reason, RizePoint recommends that you lower the image resolution settings on your device. Doing so will minimize audit result upload times. Resolution settings are configurable on each device and must be set by the device owner. RizePoint does not change resolution settings on individual devices. |
To adjust the width of an image:

