User Prompts

This option allows administrators to prompt users to input information
at the time they log on to the website. Users can be prompted to verify
data or provide missing information, or they can be required to agree
to various license agreements in order to access the website. The following
prompt types are currently available:
- Update User Fields
- requires specified users to update their user profile by providing
the requested information when they log in to RizePoint. For example,
perhaps administrators want all users to verify their phone numbers
and email addresses once every six months. Or, perhaps a new user
field is required. A User Prompt could be configured to prompt all
users to supply this information the next time they log on, eliminating
the need for the administrator to gather this information by other
means and then personally enter all of the data.
- Update Location Fields
- requires primary contact of a location to update, or verify the
accuracy of, the information associated with their location. Administrators
can specify which information must be verified. For example, perhaps
administrations want the primary contact to confirm that the email
address and phone numbers in their location record is current every
90 days. If a user is associated with more than one location, a list
of those locations with which they are associated is displayed, and
they must select and verify each location.
- License Agreement -
requires specified users to accept the terms of the site before they
can log on successfully. For example, perhaps administrators want
all users to agree to a confidentiality statement the first time they
log on to the website. If they agree to the terms, then they may log
on to the site. If they do not accept the terms, then they are restricted
from the website.
 |
Updating Location
Fields can be custom configured by RizePoint to use one of the
following options:
- Prompt users designated
as a primary contact to update the Location information. (This
is the default setting.)
- Prompt users who have been
given direct access to a location (NOT through a role association)
to update the Location information.
- Prompt all users associated
with a location to update the location information. This would
include the person designated as the primary contact and all
users associated with the location, either through a role
assignment or directly.
|
 |
WARNING:
Use caution when assigning the
USER PROMPT permission to users. This permission should be reserved
for administrative users only.
|
SETTING UP A USER PROMPT
When a user with the USER PROMPTS permission signs on to RizePoint,
a USER PROMPTS menu entry appears in the System > Manage Users
menu.
Setting up user prompts consists of three primary steps:
Once a prompt has been created, the prompt screen will open immediately
when a user who has been designated to be prompted for information logs
in. (See User Prompts at Log In
for instructions for answering prompts.)
CREATING A NEW USER PROMPT
- Log on as a user with the USER PROMPTS permission.
- Go to System > Manage People > User Prompts.
- Click the NEW USER PROMPT button.

- In the New User Prompt window, enter a name for this user prompt.
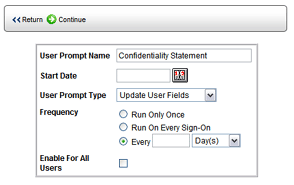
- Click the Calendar
 icon
in the START DATE field to display a calendar, then select the date
on which to begin prompting users for information.
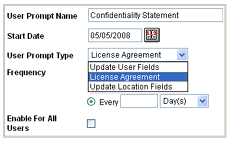
- Select the type of prompt you're creating.
- Select an option from the FREQUENCY droplist:
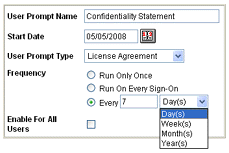
- RUN ONLY ONCE: The prompt will be run the next time the designated
users attempt to log on.
- RUN ON EVERY SIGN-ON: The prompt will be run every time the
designated users attempt to log on.
- EVERY <frequency> <unit of time>:
If you select this option, enter the frequency, then the unit
of time (days, weeks, months, years) before running the prompt
again.
- The ENABLE FOR ALL USERS checkbox varies slightly, depending on
the type of prompt being created:
- UPDATING USER FIELDS or LICENSE AGREEMENTS: Check this box
if you want to run this prompt for every user in the system. If
you want to specify only certain users, leave the box unchecked.
- UPDATING LOCATION FIELDS: Check this box if you want to run
this prompt for every user in the system who is designated
as a Primary Contact for one or more locations. If you
want to specify only certain users, leave the box unchecked.
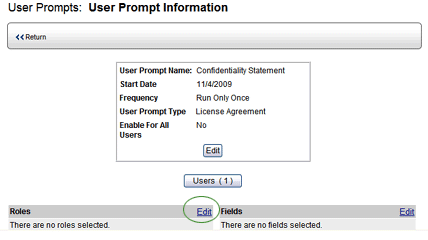
- Click CONTINUE. The User Prompt Information window opens.
SPECIFYING THE USERS
 |
If you checked
the ENABLE FOR ALL USERS checkbox, all users (or all primary contacts
associated with locations) will automatically be prompted. Therefore,
you may skip this section and go to the Specifying
the Contents of the Prompt instructions, below, to complete
prompt configuration. |
You can include individual users or all users assigned to a specific
role, or a combination of both.
The USERS button always indicates the total number of users that are
currently selected. Notice that when you first create a User Prompt, a
"1" appears on the USERS button. This is because, by default,
the user who creates the role is automatically selected as a user. You
may, however, remove this user from the User Prompt rule.
TO SPECIFY INDIVIDUAL USERS:
- In the User Prompt Information window, click the USERS button.
A list of all currently selected users is displayed. (Remember, the
USERS and ROLES buttons are only available if you did not
check the ENABLE FOR ALL USERS button.)
Note that you may also remove any previously selected users from
this window by selecting the user, then clicking the REMOVE button.
However, do you remove yourself from the list.
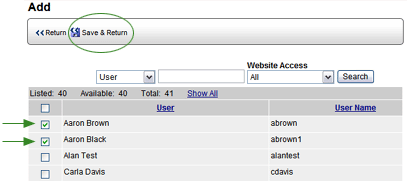
- Click the ADD button. A list of all users in the system is displayed.
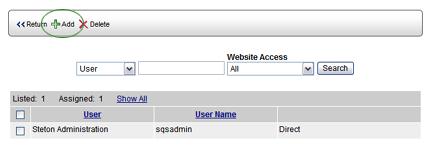
- Select the Users you want to include, then click SAVE & RETURN.
 |
If you're creating a prompt to UPDATE
LOCATION FIELDS, remember that only selected users who are
designated as primary contacts are prompted. Therefore, if
you select users here that are not Primary Contacts, they
will not be prompted even though they have been selected. |
- Click on the RETURN button at the top of the window to return to
the User Prompt Information window.
TO SPECIFY ALL USERS ASSIGNED TO A ROLE:
- In the User Prompt Information window, click the Roles EDIT link.
A list of all roles is displayed.
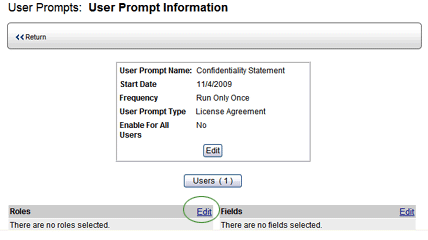
- Select the roles that you want to include.
- Click the SAVE & RETURN button. Notice the USERS button in
the User Prompt Information window. It updates to display the total
number of users currently selected to be included in this User Prompt.
SPECIFYING THE CONTENTS OF
THE PROMPT
USER OR LOCATION INFORMATION:
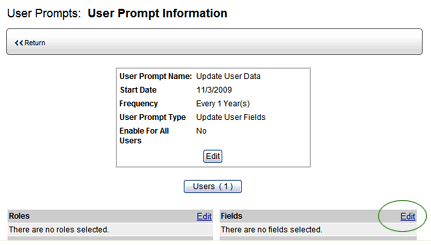
- In the User Prompt Information window, click the Fields EDIT link.
 |
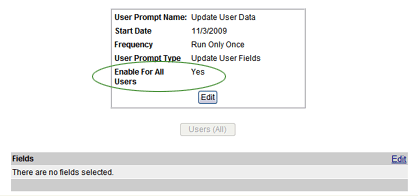
If you checked the ENABLE FOR ALL USERS
checkbox, then no USERS button or Roles fields are available
on the User Prompt Information page, because all users are
automatically included. Instead, only the FIELDS-EDIT link
is available.
 |
A list of all user or location fields is displayed. These are the
same fields that are available when you create or edit an existing
user or location in Mobile Manager. It includes user or location information
such as address, phone, etc., as well as any user-defined fields that
appear there.
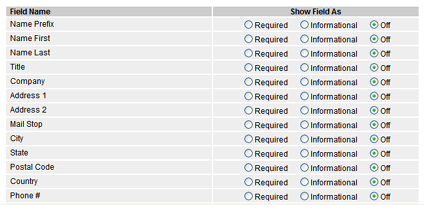
- Click either the REQUIRED or INFORMATIONAL radio buttons beside
the fields that you want to be updated. Note that if the field is
designated as INFORMATIONAL, the user may leave the field blank when
validating the data. The user may not leave a field designated
as REQUIRED blank.
- Click SAVE & RETURN.
LICENSE AGREEMENT:
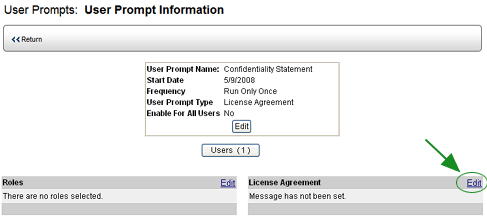
- In the User Prompt Information window, click the License Agreement
- EDIT link.
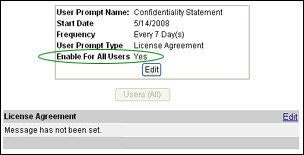
Note that if you checked the ENABLE FOR ALL USERS checkbox, then
no USERS button or Roles fields are available on the User Prompt Information
page, because all users are automatically included. Instead, only
the LICENSE AGREEMENT-EDIT link is available.
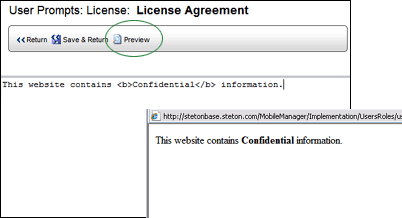
- Enter the text of the license agreement in the field provided.
You may click the PREVIEW button to see what the text looks like.
Note that you may use HTML formatting, if desired.
- Click the SAVE & RETURN button.


