Managing Policies

 |
OPTIONAL FEATURE - Contact your
RizePoint representative to enable/disable this option. |
Managing policies consists of the following:
 |
To view the
permissions associated with Policies and Waivers, see the permissions
associated with the WAIVERS group in the Permissions
List. |
 |
The
first step in setting up a policy requires the creation of a hierarchical
folder structure—called
the Policy
Tree— to store the policy standards.
Each top-level folder you create represents a separate policy
(or "book" of standards); the top-level folder is also
referred to as the "parent node." The parent node folder
may contain multiple subfolders—or
levels— also
in a hierarchical structure, but the parent node folder itself
cannot contain a standard.
The points
below govern where standards are placed within the Policy Tree:
- Standards reside
only at the lowest level of a branch of the Policy Tree.
- The
creation of a standard in a folder automatically sets the
"lowest level" for that branch.
- Each branch of a Policy
Tree can have as many levels as you require. You may continue
to create sublevels within a folder as long as the folder
does not contain any standards. As soon as standards have
been added to a folder, the functionality to add new levels
is no longer available. If you delete the standards in a folder,
then you can create additional sublevel folders.
|
 |
Adding
Levels to the Policy Tree
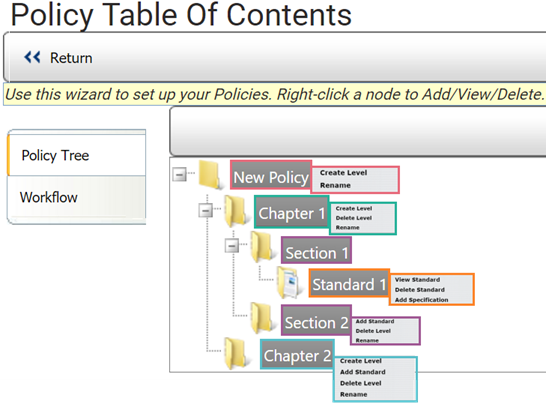
As you create levels within the
Policy Tree, right click on a folder. The options for adding levels
or standards will display to the right of each folder as shown:
|
- Go to System > Policies & Waivers > Policies.
- Click the NEW button. The Policy Table of Contents page opens.

- Right-click the NEW POLICY folder. Two menu options appear in the
menu: CREATE LEVEL and RENAME.
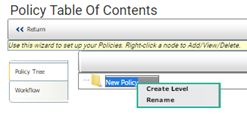
- Select the RENAME command.
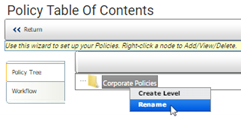
- Enter a name for this policy manual.
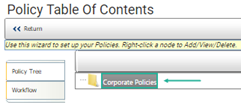
- Right-click on the folder and select the CREATE LEVEL command.
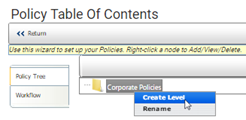
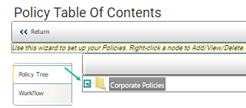
- A new folder is created inside the top level folder. Click the
"+" icon to open the new sub-folder.
- Enter a name for this sub-folder.
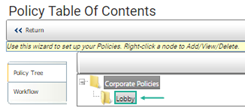
- To create another folder at this level, right-click the top-level
folder and select CREATE LEVEL.
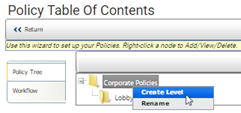
- Enter a name for the next sub-folder.
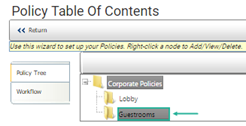
Continue to add as many second-level folders as required. If you
require third-level folders as well, simply right-click on a second-level
folder to place a new folder inside.
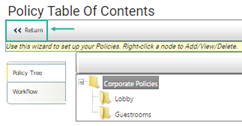
- When the folder structure is complete, click RETURN.
To
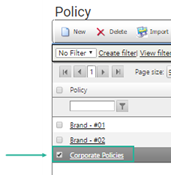
delete a policy:
- Check the box beside the policy that you want to delete.
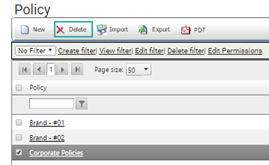
- Click the DELETE button.
To
rename a level:
- Right-click on the folder.
- Select the RENAME command. You may then enter a new name for the
level.

To
delete a level:
- Right-click on the folder.
- Select the DELETE LEVEL command.

Standards (or "Policy Standards") are stored in the folder
that resides in the lowest level of the hierarchy. You may add as many
standards as necessary, but they must be placed in the lowest level folder.
- Log on as a user with permission to create a new policy. See the
Permissions List
and view permissions in the WAIVERS group.
- Go to System > Policies & Waivers > Policies.
- Select the policy folder to open it.
- Right-click on the folder and select ADD STANDARD.
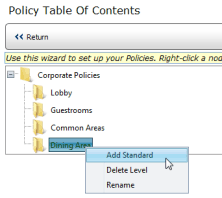
- Enter a name for the standard, and any keywords that locations
requesting a waiver to this standard can use to search for it.
- In the STANDARD REFERENCE field, enter a Reference ID for this
standard. Note that this field is required. It does not need to be
unique. You may assign the same Reference ID to similar standards,
for example.
- If this standard is eligible for a waiver, check the WAIVER ELIGIBLE
checkbox.
- Enter the text of this standard.
- The DIRECTIVE and IMPLEMENTATION GUIDANCE fields are optional and
can be used to provide a reason for this standard, as well as supplemental
information.
- Click the SAVE button.
To
edit a standard:
- Right-click on the policy that you want to edit and select VIEW
STANDARD.
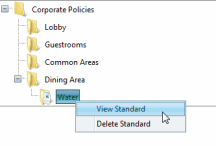
- Click the EDIT button.
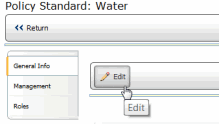
- Edit the policy.
- Click SAVE.
To
delete a standard:
- Right-click on the policy that you want to edit.
- Select DELETE STANDARD. The standard is removed from the folder.

| ASSOCIATING
THE STANDARD WITH A MANAGEMENT RECORD |
- Locate the standard, then right-click on it and select VIEW STANDARD.

- Click the MANAGEMENT tab. A list of all management records associated
with this standard is displayed.

- Click the ADD button.
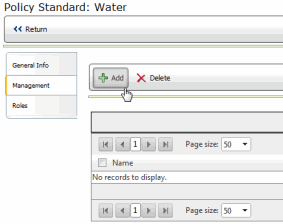
- Select the management record(s) that you want to associate with
this standard.
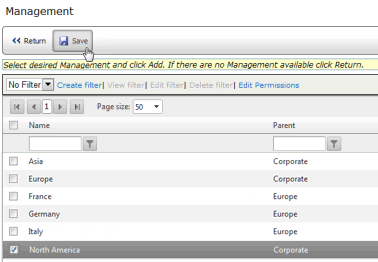
- Click the SAVE button.
This standard will apply to all locations within the selected management
record(s).
| ASSOCIATING
THE STANDARD WITH A ROLE |
The order in which roles are added to a standard is extremely important
if using an AUTOMATIC workflow type, as this type of workflow progresses
in the order in which the roles are added to a standard.
- Locate the standard, then right-click on it and select VIEW STANDARD.

- Click the ROLES tab.
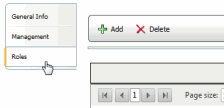
- Click the ADD button.

 |
You may add multiple roles at one time.
However, because the order in which you add roles (the order
the roles appear on the ROLES tab) determines the order in
which an AUTOMATIC workflow progresses, it may be necessary
to add one role at a time to maintain the proper order. |
- Select the role to associate with this standard.
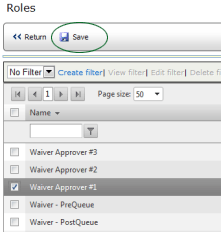
- Click the SAVE button.
The person(s) assigned to the role specified here will be responsible
for approving the waiver.
| ASSOCIATING
A POLICY WITH A WORKFLOW |
Each policy must be associated with a workflow.
It determines how a waiver to any standard within the policy moves through
the approval process. If you haven't already created workflows, you'll
need to come back to the policy later and associate it with a workflow.
It is extremely important to remember to do this -- a waiver cannot be
approved without an associated workflow!
Also, remember that each top-level folder represents a single
policy. You are associating the workflow to every standard within the
policy, regardless of its placement within the policy hierarchy.
- Go to System > Policies & Waivers > Policies.
- Click on the Policy to select it.
- Click the WORKFLOW tab.
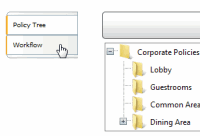
- Select the workflow from the droplist.
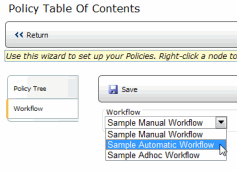
- Click the SAVE button. Whenever a waiver is requested on a standard
in this policy, the selected workflow will be used for the approval
process.
- Click RETURN to return to the list of policies.

ref:
Waivers


