Join a Data File to a Worksheet

Before you join a data file to a Search-driven Analytics (SDA) worksheet,
you will first need to upload
the data file.
Join a Data File to a Worksheet
- Ensure that you upload
the data file into Search-driven Analytics.
- From the SDA main menu, navigate to DATA > TABLES > ALL TYPES.
A list of all worksheets and uploaded data files will display. In
this example, we are going to connect the Test Account ID Spreadsheet
to the Location worksheet.
- Click on the name of the worksheet. For this example, we will select
the LOCATION worksheet.

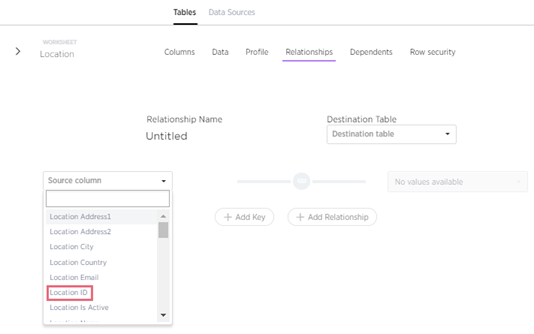
- Select RELATIONSHIPS.

- From the SOURCE COLUMN drop-down menu, select the worksheet column
that matches the equivalent column in the data file. In this example,
the LOCATION ID column equals the ACCOUNT ID column in the data file.

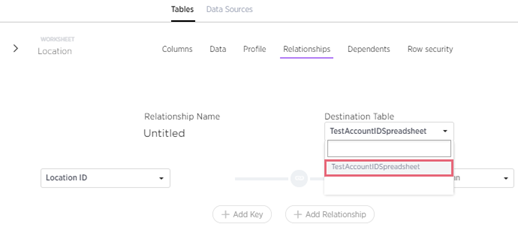
- Select the Destination Table. Each table available in the drop-down
menu is a table that is generated when you upload
a data file.

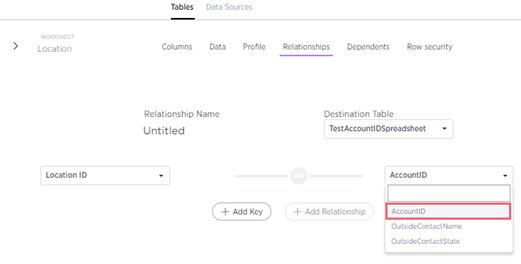
- Select the DESTINATION COLUMN from the drop-down. Columns that
display in this drop-down menu are pulled from the data file that
you uploaded.

- Select ADD KEY.

- Select ADD RELATIONSHIP.
 |
You can
join a data file to more than one worksheet. |

If the relationship between the worksheet and the data file was successful,
a confirmation dialog will display to the right of the SDA main menu.

You can now conduct a keyword search
on the data imported from the data file.
Delete a Table
 |
After you have
joined a data file to a worksheet, the relationship between the
two cannot be deleted unless you delete the table.
If any pinboards
or answers were generated with data pulled from the table you
want to delete, you will be required to delete those artifacts
before deleting the relationship between the worksheet and spreadsheet. |
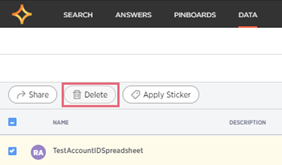
If you want to delete a table, navigate to DATA > TABLES > ALL
TYPES. Select the checkbox next to the name of the table (the imported
file), then select DELETE.


