
| The administrator must have the ACTIVE HOME PAGE ADMIN permission to create, edit, and delete Active Home Pages. See Assigning the Active Home Page Permission. |
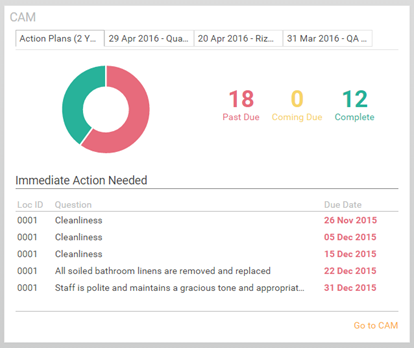
The Corrective Action Management (CAM) widget displays at-a-glance CAM information for end users and provides the drill-down capabilities to many CAM details in the CAM grid. The widget's tabs can be configured to display audit results for one or two years. The administrator assigns the CAM widget to appropriate roles or users, and only one widget of this type can be assigned for each active home page.
For information on adding widgets to an active home page, see Creating a New Active Home Page.
To view this widget from the perspective of an end user, see CAM Widget.
To configure the widget to show data for the past one (1) or two (2) years, see Configure CAM Widget for Number of Years.

The navigational tabs across
the top of the widget display data from the past one (1) or two (2) years,
as configured by your administrator. The tabs include:

| The question text that displays in the CAM widget has been configured to display only formatted text; no HTML tags will be visible. |
To configure the CAM widget to pull data from the past one (1) or two (2) years:
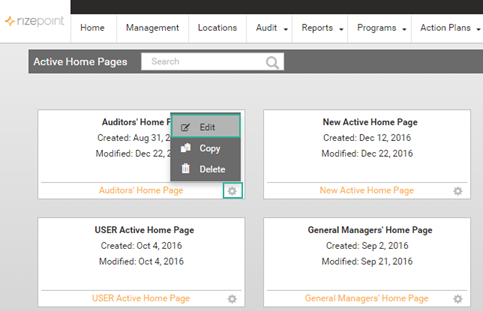
Go to SYSTEM > ACTIVE HOME PAGE ADMIN.
Click
the cog wheel of the Active Home Page you are editing, then select
EDIT. In this example, we are using the AUDITORS' HOME PAGE. Alternatively,
you can also access this active home page by clicking the name of
the home page (in orange font) at the bottom of the thumbnail.

Navigate
to the CAM widget and select the EDIT WIDGET CONFIGURATION icon.
![]()
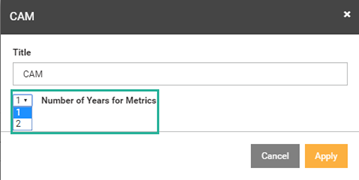
From the CAM widget dialog box, click
the dropdown arrow next to NUMBER OF YEARS FOR METRICS. Select the
number of years in the past (1 or 2) for which you want CAM data to
display in the widget.

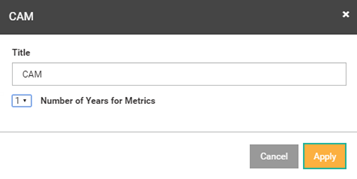
Click
APPLY to save the selection. Click CANCEL to cancel your selection.

Verify
that the CAM widget tab displays the correct number of years.

Click
the SAVE CHANGES icon in the top right of the screen.

Log in as the role or user to verify that the CAM widget displays with the new configuration.
