Creating a New Schedule

 |
For a list
of all permissions including those associated with the Schedule
group, see the Permissions
List. |
To create a new schedule:
- Log on as a user with SCHEDULE - NEW permission.
- Go to System > Schedule Setup > Manage Schedules.
- Click the NEW button.
|
The NEW
button is only available if you are currently logged on as
a user with permission to create new schedules. |
- Enter a name for this schedule.
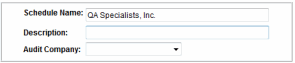
- Enter a brief description of this schedule.
- From the AUDIT COMPANY droplist, select the audit company associated
with this schedule. Note that this field is required if this schedule
will be used in conjunction with the Program
Compliance system. Otherwise, this field is optional.
- Click the SAVE & RETURN button. The schedule appears in the
Schedule window.
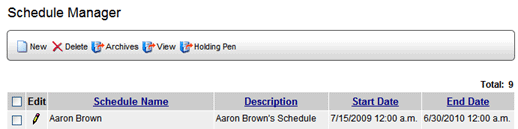
To edit the name or description of a schedule:
- Click the EDIT pencil
 beside the schedule you want to edit.
- You may edit the name of the schedule, the description, or the
Audit Company associated with this schedule.
- Click the SAVE & RETURN button.
To delete a schedule:
- Select the schedule you want to delete.
- Click the DELETE button beside.
The selected schedule is removed from the list.
See Adding Items to a Schedule.
