Audit Results

Selecting VIEW AUDIT RESULTS from the Audit menu or FEEDBACK REPORTS from
the Reports menu displays a list of all audit results available to you.
Once an online audit has been approved, or an audit has been completed
and uploaded to the database from Mobile Auditor, it is immediately available
for viewing.
The access rights associated with your username
and password determine which audit results you can view. Your system administrator
specifies the access rights of all users during system setup. If you log
on as a manager, you may have access to all results. If you log on as
an auditor, however, you may only have access to audits that you have
conducted.
 |
When the SHOW APPROVAL STATUS option
is enabled, a permission, RESULTS - VIEW STATUS becomes available.
Only users with this permission are able to see this column.
Contact your RizePoint representative for details. |
VIEWING AN AUDIT RESULTS REPORT
- Select Audit > View Audit Results OR
Reports > Feedback Reports from the menu bar.
A list of all results available to you is displayed.
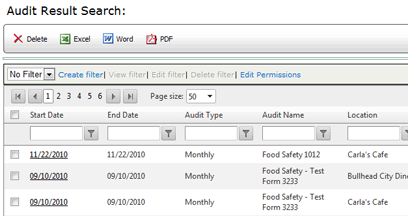
- Click the date link of the results you want to view. A list of
available feedback reports is displayed.
- Select the report you want to view. The following reports may be
available. Note that in addition to the first three report types listed
below, many custom feedback reports may also be available.
- ACTION PLAN - This report
allows users to specify a plan of action for correcting non-compliancies,
identify the person responsible, and specify a due date and completion
date.
- AUDIT MAINTENANCE TOOL
- This report allows users to change different aspects of an audit
result that has already been uploaded to Mobile Reporter.
- AUDIT SUMMARY - This report
provides an overview of the entire audit. It breaks down the results
by category. You may view the answer choices of all questions,
or of only non-compliant questions.
- CUSTOM
FEEDBACK REPORTS - Your administrator can create
a library of custom audit summaries that contain specific
information that can be used with any audit form. This report
may also be viewed in PDF format.(These custom feedback reports
were referred to as Executive Summary feedback reports in previous
versions of RizePoint.)
- REPEAT
VIOLATIONS REPORT* (optional) - This report displays an audit
summary that includes the point values earned on this audit, as
well as the points earned on the same questions that appeared
on the previous audit.
- Click on the report you want to view.
SCHEDULING ANOTHER AUDIT FOR THIS
LOCATION
The SCHEDULES tab is provided to allow you to quickly and easily schedule
another audit for this location. Clicking this tab and scheduling an audit
here is the same as going to Audit
> Schedule Audit > Request an Audit. Note that this tab does
NOT pertain specifically to this audit -- it is merely a shortcut to the
REQUEST AN AUDIT command and is provided for your convenience.
ATTACHING
FILES TO AUDIT RESULTS
The ATTACHED FILES tab allows you to attach supplemental or supporting
documentation to audit results. All file formats are supported, including
image files. The typical maximum file size is 10 MB.
Contact RizePoint if you need to increase the maximum file size allowed
on your site.
Each aspect of file management requires a specific permission, so you
can allow some users access to only view the files, and allow other users
to add, edit, or delete these files. The following permissions determine
who has access to this area:
- RESULT MENU - ADD/EDIT ATTACHED DOCUMENTS - Allows a user to add/edit
documents attached to an audit result in the audit result feedback
report menu. The VIEW ATTACHED DOCUMENTS permission is also required
in order to edit or add files.
- RESULT MENU - DELETE ATTACHED DOCUMENTS - Allows a user to delete
documents attached to an audit result in the audit result feedback
report menu. The VIEW ATTACHED DOCUMENTS permission is also required
in order to delete files.
- RESULT MENU - VIEW ATTACHED DOCUMENTS - Allows a user to view documents
attached to an audit result in the audit result feedback report menu.
To add a file to an audit result:
- Go to Audit > View Audit Results.
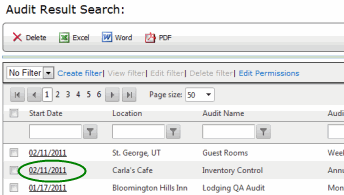
- Locate the audit result that you want to attach a file to, then
click on the corresponding DATE link to select it.
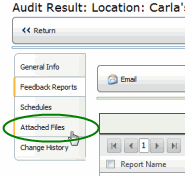
- On the left, click on the ATTACHED FILES tab. A list of currently
attached files is displayed.
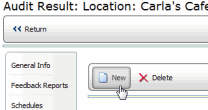
- Click the NEW button.
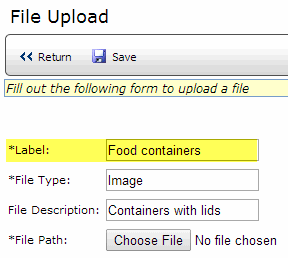
- In the LABEL field, enter a name for the file. This is the name
that will appear in the Attached Files list. It may differ from the
actual name of the file.
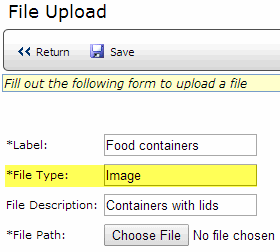
- Enter the type of file. The File Type field is text only, therefore,
you do not need to specify a file extension. Examples of acceptable
file types might be: letter
or image, or
Word document. This
is a required field.
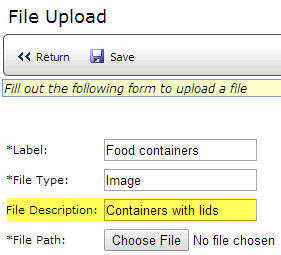
- In the optional File Description field, you may enter a brief description
if necessary.
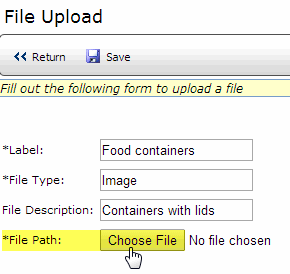
- Click the CHOOSE FILE button to locate and select the file that
you want to attach.
- Click SAVE.
- Click RETURN. The file is added to the audit result and now appears
in the Attached Files list.
- From the Attached Files list, click on the name of the attached
file.
- From the File Upload page, click DOWNLOAD. The attached file will
download so you can open and view it.

VIEWING
THE CHANGE HISTORY OF THIS AUDIT RESULT
Click the CHANGE HISTORY tab to display a history of all changes made
to this audit result. The information includes the date of the change,
as well as the name and user ID of the person who made the change.


